m2c microscopy measurement & calibration

Beschreibung

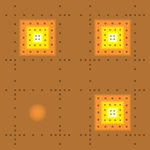
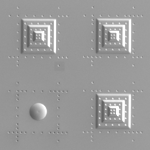
3D SEM calibration structures consist of an array of three multi level single pyramids and contain a spherical element for the calibration of the four backscatter detectors. The spherical element has a base diameter of 10 µm and a height of about 1µm. The design of the calibration structure includes circular reference marks (nanomarker) with exactly measured centre coordinates (reference information). In combination with our 3D calibration software microCal, the calculation of all three scales of your 4Q-BSE-detector system can easily be achieved. We provide the reference information as a data file on CD/ROM together with the 3D calibration structure.
Spezifikationen
3D SEM calibration structures are available for several scan areas, from 40 μm x 40 μm and up to 80 μm x 80 μm. The complete structure with three pyramidal elements (full area) or a single pyramidal element (quarter area) may be used for the automated calibration process.
| Type | Device | Size (µm²) | Number of Structures | Steps | Step Height (nm) | Total Height (nm) | Gradient (deg) | Nanomarker Diameter (nm) |
|---|---|---|---|---|---|---|---|---|
| MMC-80-4BSD | 4Q-BSD-SEM | 90x90 | 4 | 3 | 1000 | 3000 | 38.5 | 800 |
| MMC-40-4BSD | 4Q-BSD-SEM | 45x45 | 4 | 3 | 600 | 1800 | 56 | 600 |
Please note: This table contains only nominal values. The real dimensions differ from these nominal values. For calibration, the reference marks have to be used. To provide a traceable calibration, reference measurements are performed by the German metrological institute PTB upon request.

